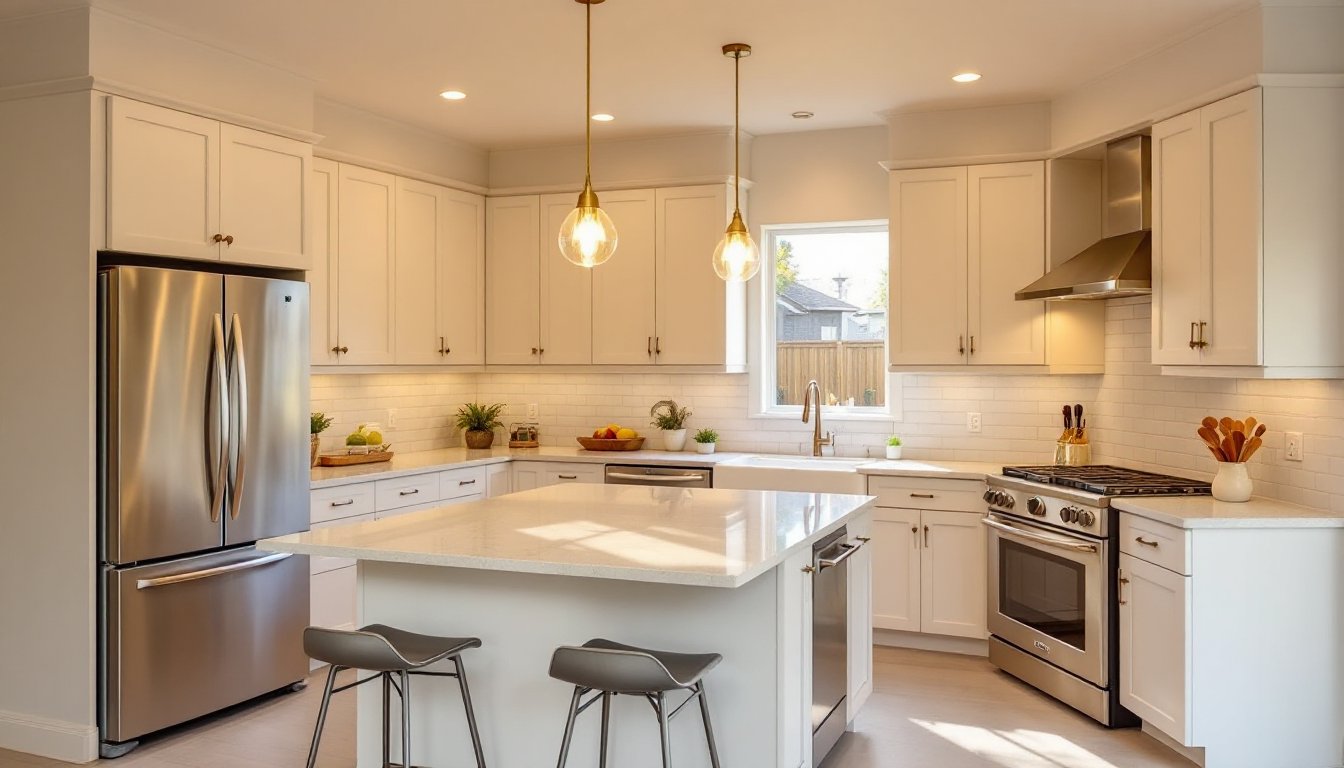
The laundry room is often an afterthought in home design, a utilitarian space crammed into a corner or basement. But that doesn’t mean it has to look like one. Adding shelving above the washer and dryer transforms wasted overhead space into functional storage while keeping detergents, supplies, and linens within arm’s reach. Whether you’re working with a compact apartment setup or a sprawling utility room, shelf over washer and dryer ideas offer practical solutions that marry storage with style. This guide walks through seven approaches, from floating shelves to enclosed cabinets, so you can pick the right fit for your space, skills, and budget.
Table of Contents
ToggleKey Takeaways
- Shelf over washer and dryer ideas maximize 24–36 inches of wasted overhead space, creating functional storage for supplies while keeping your laundry room organized and visually polished.
- Floating shelves offer a modern, easy-to-clean solution, but require accurate stud location and 3-inch wood screws anchored to wall studs for safe, 50–75 pound weight capacity.
- Enclosed wall-mounted cabinets and lockers hide clutter and cleaning products while delivering a more finished aesthetic, though they need heavier-duty fastening like ¼-inch bolts or L-brackets rated for at least 100 pounds.
- Always locate wall studs with a multi-scanner before drilling, measure twice from a consistent reference point, and pre-drill pilot holes to prevent wood splitting and ensure level, secure installation.
- Paint shelves with quality primer and two finish coats plus polyurethane, then organize with labeled bins and rolling containers to maximize both functionality and visual appeal in your laundry space.
Why Add Shelving Above Your Washer and Dryer
Most laundry appliances sit roughly 36 inches tall, leaving 24–36 inches of open wall space up to standard 8-foot ceilings. That’s prime real estate for storage. Shelves above washers and dryers keep cleaning supplies, fabric softeners, and spare linens close by, no more hunting through closets or cabinets in other rooms. They also improve organization and reduce clutter on countertops and floors where lint, detergent spills, and dropped items accumulate.
Beyond functionality, adding shelving upgrades the laundry room’s appearance. A finished installation signals that you care about the whole house, not just the living spaces guests see. Floating shelves add a modern, minimalist touch: wall-mounted cabinets create a more polished, built-in look. Both approaches improve the room’s visual weight and make the space feel intentional rather than thrown together.
One key advantage: you don’t need to disrupt the appliances themselves. Shelves mount directly to the wall studs behind or beside the washer and dryer. As long as you locate studs accurately and use proper anchors, typically 3-inch wood screws or toggle bolts, your installation will be rock-solid and safe.
Open Shelving: Maximizing Visibility and Easy Access
Open shelves let you see everything at a glance, making it simple to grab what you need in a hurry. They also visually “lighten” a small laundry room because they don’t block sight lines the way cabinets do.
Floating Shelves for a Modern Look
Floating shelves, those that mount flush to the wall with no visible support brackets underneath, deliver clean, contemporary appeal. They work especially well in laundry rooms because they’re easy to wipe clean and don’t trap dust in corners or crevices.
Installation Basics:
Floating shelves require a French cleat system (two L-shaped boards interlocked) or industrial-grade floating shelf brackets bolted to wall studs. Standard 1×10 or 1×12 lumber (actual dimensions roughly 0.75″ × 9.25″ or 11.25″) works well and can support 50–75 pounds per shelf when properly fastened. Drywall alone won’t hold the weight: you must hit studs, which are typically spaced 16 inches on center.
Measure twice, mark stud locations with a stud finder, and use a level to ensure your mounting board is perfectly horizontal. Uneven shelves look sloppy and cause items to slide. Drill pilot holes to prevent splitting, then drive 3-inch wood screws (minimum 2 per stud, ideally 3 or 4) into the wall studs.
Many DIYers install 2–3 shelves spanning the full width above the machines. Space them 12–18 inches apart vertically to accommodate bottles and baskets. Keep heavier items (cleaning supplies, spare towels) on lower shelves and lighter goods (dryer sheets, lint traps) higher up.
Floating shelves do require carpentry confidence. If you’re unsure about locating studs, drilling straight holes, or anchoring to drywall, call a handyperson. A botched job, shelves that sag or pull away from the wall, creates safety hazards and frustration. Pre-made floating shelf kits (brands like Floating Shelf Co or similar) simplify the process if you want a shortcut.
Enclosed Storage Solutions for a Cleaner Aesthetic
If open shelves feel too sparse or if you’d rather hide cleaning products and lint rollers, enclosed cabinets and lockers create a more finished, cabinet-like appearance.
Wall-Mounted Cabinets and Lockers
Wall-mounted bathroom or kitchen cabinets repurposed above laundry appliances offer closed storage that controls dust and visual clutter. Steel or wooden lockers, salvaged or new, add industrial flair and function. Both mount the same way: locate studs, secure with ¼-inch bolts or heavy-duty wood screws, and level carefully.
Cabinetry is heavier than open shelves, so you need a solid foundation. Two steel L-brackets (rated for at least 100 pounds each) per cabinet, positioned at the top corners and bolted to studs, provide stability. Standard cabinets are 12–15 inches deep and 24–36 inches wide, fitting neatly above most front-load washers and dryers.
For a more custom look, some builders construct simple plywood boxes (¾-inch exterior plywood, dados jointed at corners for strength) and hang them with French cleats. This approach lets you size cabinets exactly to your wall space. You’ll need basic power tools, a circular saw or miter saw for crosscuts, a drill, and possibly a Kreg jig for pocket-hole joinery, and some patience. If woodworking feels overwhelming, platforms like Fix This Build That offer step-by-step plans and tool guidance.
Doors add polish but require hinges, handles, and adjustments to hang straight. Frameless, open-front baskets or bins sliding into a cabinet frame work just as well and skip the hardware hassles. Paint or stain the boxes to match trim or appliances.
DIY Installation Tips and Best Practices
Before you pick up a drill, prep the space properly. This is where most DIY shelf projects fail.
Preparation Steps:
- Clear the wall. Remove any outlet covers, light switches, or existing hardware. If outlets sit in your shelf zone, plan to relocate them, this requires a licensed electrician in most jurisdictions.
- Locate studs. Use a stud finder (magnetic or electronic) to mark studs with light pencil marks. Studs are typically 16 inches on center (sometimes 24 inches in older homes). Mark both the left and right edges so you know the exact stud centerline.
- Check for pipes and wiring. Washers and dryers use water, drain, and electrical lines behind walls. Before drilling, trace where supply lines and outlets feed the appliances and avoid those areas. When in doubt, use a multi-scanner that detects metal and electrical current.
- Measure carefully. Use a level and measuring tape to mark mounting holes. Measure from a consistent reference point (the top of the appliances, a windowsill, or the ceiling) so shelves sit at the same height on both sides.
Safety & Tools:
Wear safety glasses when drilling overhead, dust and debris fall downward. Work gloves protect against sharp edges and splinters. If fastening through existing finishes (paint, drywall), a drywall vacuum attachment on your drill catches most mess.
Tools needed: stud finder, drill with bits (⅛-inch pilot bits for wood: ⁵⁄₃₂-inch for bolts), level, measuring tape, pencil, saw (if cutting lumber), paintbrush or roller (if finishing shelves).
Fastening Methods:
Screw directly into studs with 3-inch wood screws (at least 2–3 per shelf). Pre-drill a pilot hole to prevent the wood from splitting and to make the screw easier to drive, a common issue DIYers skip and then regret.
If studs don’t align with your ideal shelf placement, toggle bolts or heavy-duty anchors can work in drywall alone. But, they’re not as reliable as studs. Toggle bolts support 50–100 pounds depending on the wall thickness and material: they’re better suited to lighter shelves or small cabinets. For anything over 75 pounds, stud fastening is essential.
Consider that laundry room floating shelves can be designed with built-in styling that complements your appliances. Research real builds and material sourcing before committing to your own design.
Finishing Touches:
Paint or stain shelves to match your décor. Primer + two coats of quality paint ensures a durable, wipeable finish, important in a moisture-prone laundry room. Polyurethane top coat adds extra protection. Let paint cure fully (24–48 hours) before loading shelves.
Organize with clear bins, labeled containers, or pretty baskets to maximize space and keep items visible. Rolling bins under open shelves add mobility for heavier detergent jugs. Mount a small magnetic strip inside or on the side of a cabinet for lint trap storage.
Conclusion
Shelving above the washer and dryer transforms wasted vertical space into organized, accessible storage while upgrading your laundry room’s appearance. Whether you choose sleek floating shelves, industrial lockers, or closed cabinetry, the key is honest assessment of your skill level and careful prep work. Measure twice, locate studs accurately, and don’t cut corners on fasteners. A day of careful work delivers years of functional, attractive storage that makes laundry day just a bit easier.